Kodaslide LED Backlighting
After getting frustrated with dim yellow or flickering bulbs in my
stereo viewers, I decided to try converting it to LED illumination.
I wanted to also be able reverse the work completely, leaving no damage
at all to my classic viewer. The result is what you see below.
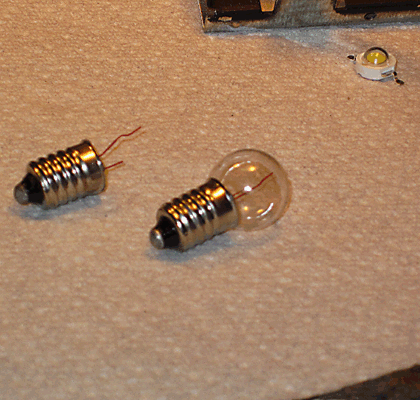
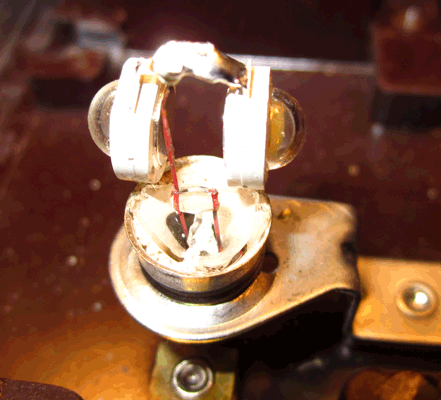
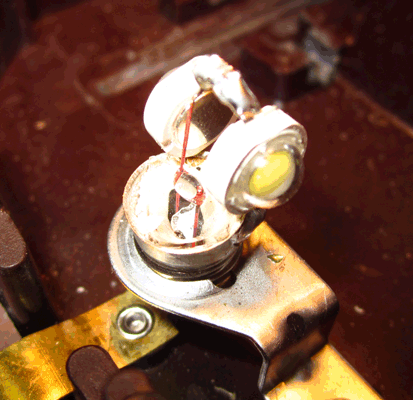
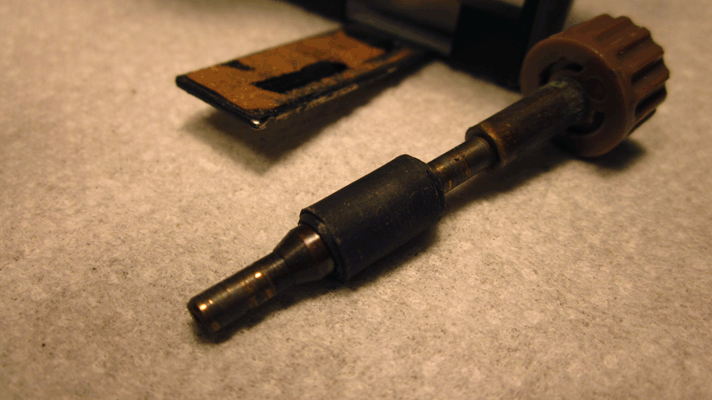
First I removed the
glass from a normal 3V bulb and soldered a piece of rigid wire to the
centre terminal. Then I soldered two 3V LEDs in parallel, as shown
below.
 Focus Repair
All of these kodak viewers have a focus problem. When the viewer is
unused for a short period of time, the focus shaft tends to sink into
the cork friction pad which is intended to facilitate the movement of
the slide holder. To Prevent this problem I remove the cork pad, and
make the focus shaft bigger, by shrinking several layers of electrical
heat shrink over the active part ot the shaft.
This solution works like a charm.
Widening the Slide Holder
To allow the viewer to work with wider 7perf or 8perf slides I use a
Dremel type of rotary tool, with a thin cut off disk. It is fairly easy
to cut the stainless steel and get a clean looking final product. Doing
this with a plastic slide holder would seem to be easier, but it isn't.
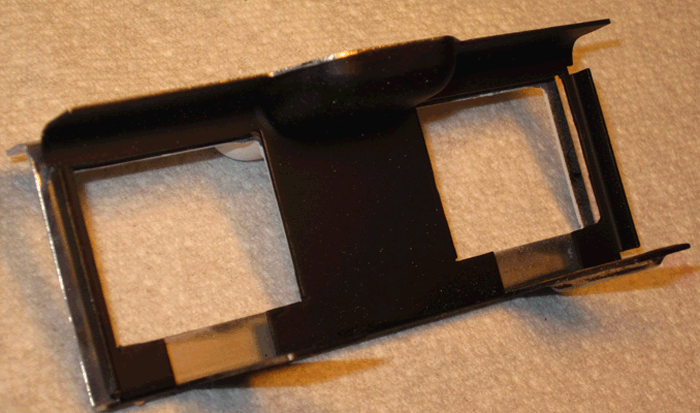
After cutting, you will need to tape up and spray paint your widened slide holder.
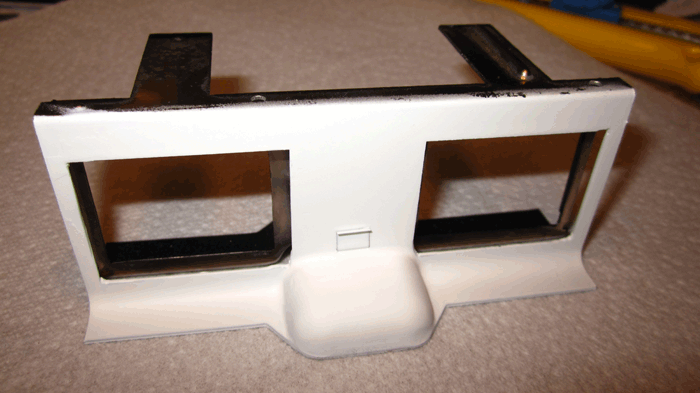
Black for the front, and white for the light chamber side.
Note: For use with 8perf slides, a piece of the
Kodaslide that holds the reflector in place will encroach in the view.
This can be solved by attaching a thin diffuser on the white side of
the slide holder.
The bottom line is. this is a great upgrade. No damage to the viewer, a
much brighter image (I much prefer under exposed images for
their saturation and bright colour), no heat build up, no infrared
damage to the slides, long battery life, and no cord, all for about $10
and an hour's work.
I love my hand viewer again!
Another note on the Kodaslide viewer: Many people
prefer the Realist Red Button viewer, since the lenses show less
chromatic abberation and also
because they exhibit less "pin cushion". Looking through my two
Red Button viewers, I notice nearly as much pin cushion as the
Kodaslide. The Kodaslide also has higher contrast, since there is flat
paint on the inside of the lens rings. To be fair, a carefull spray of
flat black paint should improve the contrast of the Red Button. This
difference is also not noticable when using a dim halogen bulb for
illumination.
Another reason I like the Kodaslide is the ergonomics! It feels
great in your hands, is easy to pick up and use, it doesn't hurt your
nose, and no matter how hard you push your face against it, it won't go
out of focus ( of course you don't have to push your face against it
since it has lenses which are significantly larger than any of the
previously mentioned viewers).
I found a perfectly flat image in my Revere viewer and in my Sterolist
viewer. These are my next viewers to recieve LED lighting.
My Previous Attempt
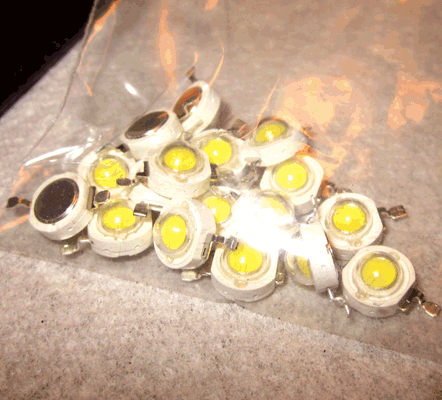
I purchased a pair of automotive LED panels from eBay that
have 36 flat ended white (relatively) LEDs. They are a tiny bit big,
but I was able to cut the circuit boards down a bit without
cutting away any important traces. I also had to cut the tops off
a row of LEDs on the Left eye panel so that it would fit
past the bulb holder in the viewer. As you can see, I have not atteched
the panels to the viewer in any way. They are free to float around, but
when the viewer is closed, there is no place for them to go.
The panel leads are soldered into the threaded portion of a .50 cent
flashlight bulb, from which I broke off the glass. This way, if I want
to remove the LED panels, I just unscrew them and screw in a bulb.
The LED panels require 12 Volts. To get this, I bought two holders for
4 double A cells. The total Voltage of 8 cells is 12v. I then soldered
a small square of aluminum sheet to each of the leads and hot
glued one to each end of the holder. Voila! two 6v batteries, the
same size as a D cell.
The colour of the LEDs is a bit too blue and I also needed a diffuser ,
so I created a diffuser from a white plastic shopping bag, folded over
a piece of a yellow plastic shopping bag (I will also experiment with
some strobe gels to see if I can improve the balance). The colours are
not as perfect as I would like, but after comparing with a viewer
using a halogen bulb, I have decided that the colours are more
pleasing then with the yellow cast given by the bulb.


Above is the LED panel. This one is slightly different than what
I used, but if I were to make another I would get a pair of these and
use the little plug to separate the screw thread from the LED panels.
This would make installation a bit easier.